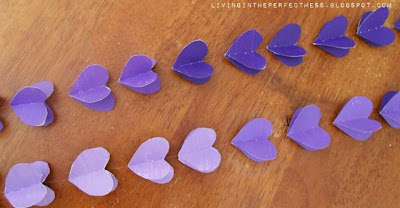
This 3-D heart garland is the perfect decoration to add colour to your room. It is a fun and easy project to do with your friends and require materials you can find at home. Have fun making this and let me know how it turns out!
Here's what you need:
- a good pair of scissors
- needle and thread (I used clear thread)
- heart stencil
- decorative paper (I painted three shades of purple on paper for an ombre effect)
- a glue stick
- pencil
Start by using the heart stencil to trace out hearts onto your paper and cut them out. You can skip this step if you have a heart punch which will definitely save you time from cutting hundreds of hearts out!
After cutting all your hearts, grab a glue stick and start gluing! You will need four pieces of hearts to make it three dimensional. First, apply glue to one heart. Fold the next piece and put it over one side of the first heart. Repeat this on the opposite side. Then add another heart on top to finish it off.
Once all the hearts are glued, trim any excess edges for a clean and polished look.
Lastly, thread the needle and secure with multiple knots. Start an up-and-down stitch at the bottom of the heart and work your way up. Continue stitching until you reach your desired length. I used about 128 cm of thread with a 1 cm gap between each heart.
You are now finished with a colourful and adorable heart garland! Hope this tutorial was helpful and gave you some inspiration!
- Kylie


